ブログをNext.js14(App Router)でリファクタリングしました

この記事ではstyled-componentsをTypeScriptで利用する方法と代表的な機能をまとめています。変数、propsやattrsの使用方法、必要な型定義なども説明します。これら基本機能を利用すれば、プログラマブルに、条件分岐等を利用して動的にスタイリングを変更する記述も可能で、拡張性の高いコンポーネントが作成できます。
目次
npmでのインストール:
npm install --save styled-components @types/styled-componentsTypescriptで利用する場合は@types/styled-componentsも必要です。
もっとも基本的な使い方は、レンダリングするHTMLタグを指定してスタイルを記述する方法です。
レンダリングするコンポーネントの外側で定義することに注意が必要です。
// <h1>タグをレンダリングする<Title>コンポーネント
const Title = styled.h1`
  font-size: 26px;
  color: red;
  /* このようにCSSを記述していく */
`

// <section>タグをレンダリングする<Wrapper>コンポーネント
const Wrapper = styled.section`
  /* スタイリング */
`

export const App: FC = () =>  {
  return (
    <Wrapper>
      <Title>Hoge</Title>
    </Wrapper>
  )
}
次のようにSCSSライクに記述することも出来ます。&が使えるのでhoverなども楽にかけます。
const Link = styled.a`
  font-weight: bold;
  margin: 10px;
  span {
    color: red;
  }
  &:hover {
    text-decoration: underline;
  }
`外部で定義されている変数を利用することが可能です。
const linkColor = "green"
// linkColorを参照
const Link = styled.a`
  color: ${linkColor}
`
export const App: FC = () =>  {
  return (
    <Link>link</Link>
  )
}
styled-componentはpropsを受け取ることが可能で、propsの値によってスタイリングを変更することが可能です。
その際、TypeScriptではpropsの型をジェネリックで渡します。
// styled-componentのprops
type ButtonProps = {
  primary?: boolean
}
// propsを受け取るstyled-component
const Button = styled.button<ButtonProps>`
  background-color: ${({ primary }) => primary ? 'blue' : 'yellow'} ;
  color:  ${({ primary }) => primary ? 'white' : 'black'} ;
`
export const App: FC = () =>  {
  return (
    <Wrapper>
      <Button>Normal</Button>
      <Button primary>Primary</Button>
    </Wrapper>
  )
}
すでにあるコンポーネントを継承、拡張することが可能です。
新しいスタイルを追加したり、既存スタイルのオーバーライドも可能です。
const Button = styled.button`
  color: white;
  background-color: red;
`

// Buttonの拡張
const ExtendedButton = styled(Button)`
  color: #000;
  background-color: #fff;
  border-radius: 0;
`

export const App: FC = () =>  {
  return (
    <Wrapper>
      <Button>Button</Button>
      <Extendedbutton>Extended</Extendedbutton>
    </Wrapper>
  )
}
asプロパティでHTMLタグを指定すると、レンダリングされるHTMLタグが変わります。
上記の例は<button>タグでレンダリングされていましたが、これを<span>や<a>タグ等に変換することが可能です。
// <Button>は <span>でレンダリングされる
// <ExtendedButton>は <a>でレンダリングされる
export const App: FC = () =>  {
  return (
    <Wrapper>
      <Button as="span">Button</Button>
      <ExtendedButton as="a">Extended</ExtendedButton>
    </Wrapper>
  )
}
自作のコンポーネントに変更することも可能です。
type Props = {
  children: string
}
const UpperdButton: FC<Props> = ({
  children
}) => (
  <Button children={children.toUpperCase()} />
)
export const App: FC = () =>  {
  return (
    <Wrapper>
      <Button>Button</Button>
      <Button as={UpperdButton}>Button</Button>
    </Wrapper>
  )
}
作ったコンポーネントにスタイルを当てることも可能です。
その際、スタイルを当てるコンポーネントはstring?型のclassNameプロパティを受け取れるようにする必要があります。
// className?と?をつけることに注意
type Props = {
  className?: string
  children: string
}
// スタイルをあてるコンポーネント
const Link: FC<Props> = ({
  className,
  children
}) => (
  <a className={className}>
    { children }
  </a>
)
// スタイリングされたコンポーネント
const StyledLink = styled(Link)`
  color: red;
  font-weight: bold;
`
export const App: FC = () =>  {
  return (
    <StyledLink>
      styled link
    </StyledLink>
  )
}
styledの対象がHTML要素ならば、そのHTML要素がそもそも受け取るプロパティはstyled-componentsになっても受け取ることが可能です。
例えば、styled.inputはinputが受け取ることが出来る「type」や「placeholder」などのプロパティを受け取ることが可能です。
const StyledInput = styled.input`
  padding: 0.5em 1em;
  margin: 0;
  border: 1px solid #ccc;
`
export const App: FC = () =>  {
  return (
    <StyledInput
      type="text"
      placeholder='入力'
    />
  )
}
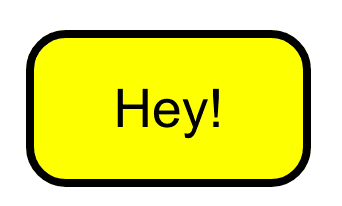
childrenというプロパティに子要素を渡すことも可能です。
<Button children="Hey!"/>
それ以外のstyled-componentsには任意のpropsを渡すことが可能です。
styledを定義するとき、attrsコンストラクタをつけるとプロパティを一緒に定義することが可能です。
const StyledInput = styled.input.attrs({
  type: 'number',
  placeholder: "1",
  min: 1,
  max: 10
})`
  padding: 0.5em 1em;
  margin: 10px;
  border: 1px solid #ccc;
`
export const App: FC = () =>  {
  return (
    <StyledInput/>
  )
}
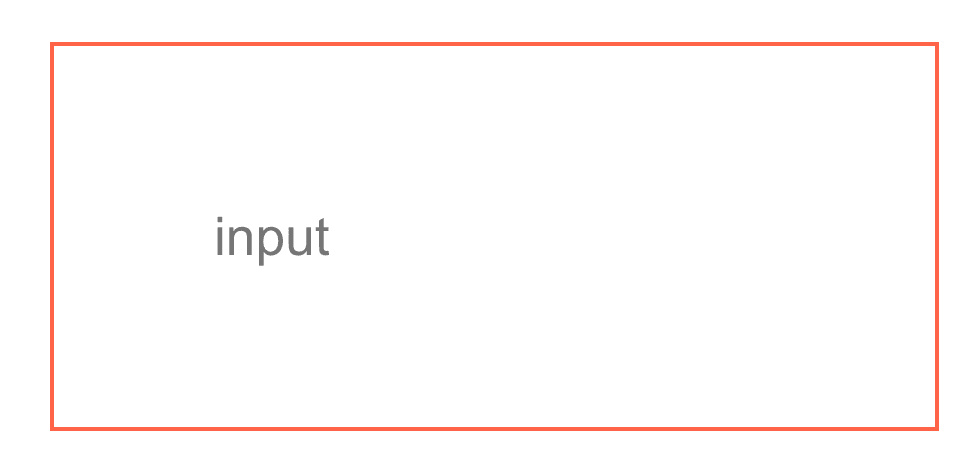
attrsには関数を渡すことも可能で、動的にプロパティを変更することもできます。
次の例では静的なtypeプロパティに加えて、sizeという動的プロパティを独自に定義して利用しています。
// 関数を取るattrsで動的なプロパティを設定
const StyledInput = styled.input.attrs(props => ({
  type: 'text',
  size: props.size || "1em"
}))`
  padding: ${props => props.size};
  margin: ${props => props.size};
  border: 1px solid tomato;
`
export const App: FC = () =>  {
  return (
    <StyledInput placeholder="input" size="3em"/>
  )
}
attrsをもつコンポーネントを拡張したコンポーネントでは、attrsの上書きが可能です。
// 関数を取るattrsで動的なプロパティを設定
const StyledInput = styled.input.attrs(props => ({
  type: 'text',
  size: props.size || "1em"
}))`
  padding: ${props => props.size};
  margin: ${props => props.size};
  border: 1px solid tomato;
`
// typeがnumberで上書きされる
const MoreStyledInput = styled(StyledInput).attrs({
  type: "number"
})`
  border: 1px solid skyblue;
`
export const App: FC = () =>  {
  return (
    <MoreStyledInput placeholder="3" size="1em"/>
  )
}
keyframesの設定も可能です。
const anime = keyframes`
  from {
    transform: rotate(0deg);
  }
  to {
    transform: rotate(360deg)
  }
`
const Rotate = styled.div`
  animation: ${anime} 1s linear infinite;
`css``で独立したCSSのブロックを定義できます。これによって、条件によって適用するCSSを丸ごと切り替える処理などが可能となります。
type ButtonProps = {
  size: string
  isBold?: boolean
}

const Button = styled.button<ButtonProps>`
  border: 3px solid #000;
  ${({ isBold }) => isBold && css`font-weight: bold` };
  ${({ size }) => {
    switch (size) {
      case 's':
        return css`
          font-size: 12px;
          padding: 6px 12px;
        `
      case 'l':
        return css`
          font-size: 20px;
          padding: 10px 24px;
        `
      default:
        return css`
          font-size: 16px;
          padding: 8px 18px;
        `
    }
  }}
`

export const App: FC = () =>  {
  return (
    <Wrapper>
      <Button size="s">Small</Button>
      <Button size="m">Medium</Button>
      <Button size="l">Large</Button>
      <Button size="l" isBold>Large & Bold</Button>
    </Wrapper>
  )
}
※あくまで機能説明のためのコード例。
コンポーネントを横断した全体のスタイルはcreateGlobalStyleで作成することが可能です。
import { createGlobalStyle } from "styled-components"
const GlobalStyle = createGlobalStyle`
  html,
  body
  {
    margin: 0;
    padding: 0;
    width: 100%;
    font-size: 18px;
    color: #333;
  }
`
export const App: FC = () =>  {
  return (
    <>
      <GlobalStyle/>
      <SomeComponent/>
      <SomeComponent/>
      <SomeComponent/>
    </>
  )
}次のように、styledで定義したコンポーネントは他のコンポーネント内で参照できます。
const Link = styled.a`
  color: red;
  cursor: pointer;
`
const Text = styled.span`
  ${Link}:hover & {
    text-decoration: underline;
  }
`
export const App: FC = () =>  {
  return (
    <Link>
      <Text>Hoge</Text>
    </Link>
  )
}
ただし、参照できるのはstyled-componentsで定義したコンポーネントだけで、カスタムコンポーネントを代入することは不可能です。
次の記事で解説しています。
以上styled-componentsの代表的な使い方を見てきました。スタイルを拡張したり、プロパティを動的に変更することでスタイルが条件分岐する、プログラマブルなスタイリングが可能であることが理解できたかと思います。
最新の記事
カテゴリー一覧
アーカイブ
目次